
Appearance
Materials
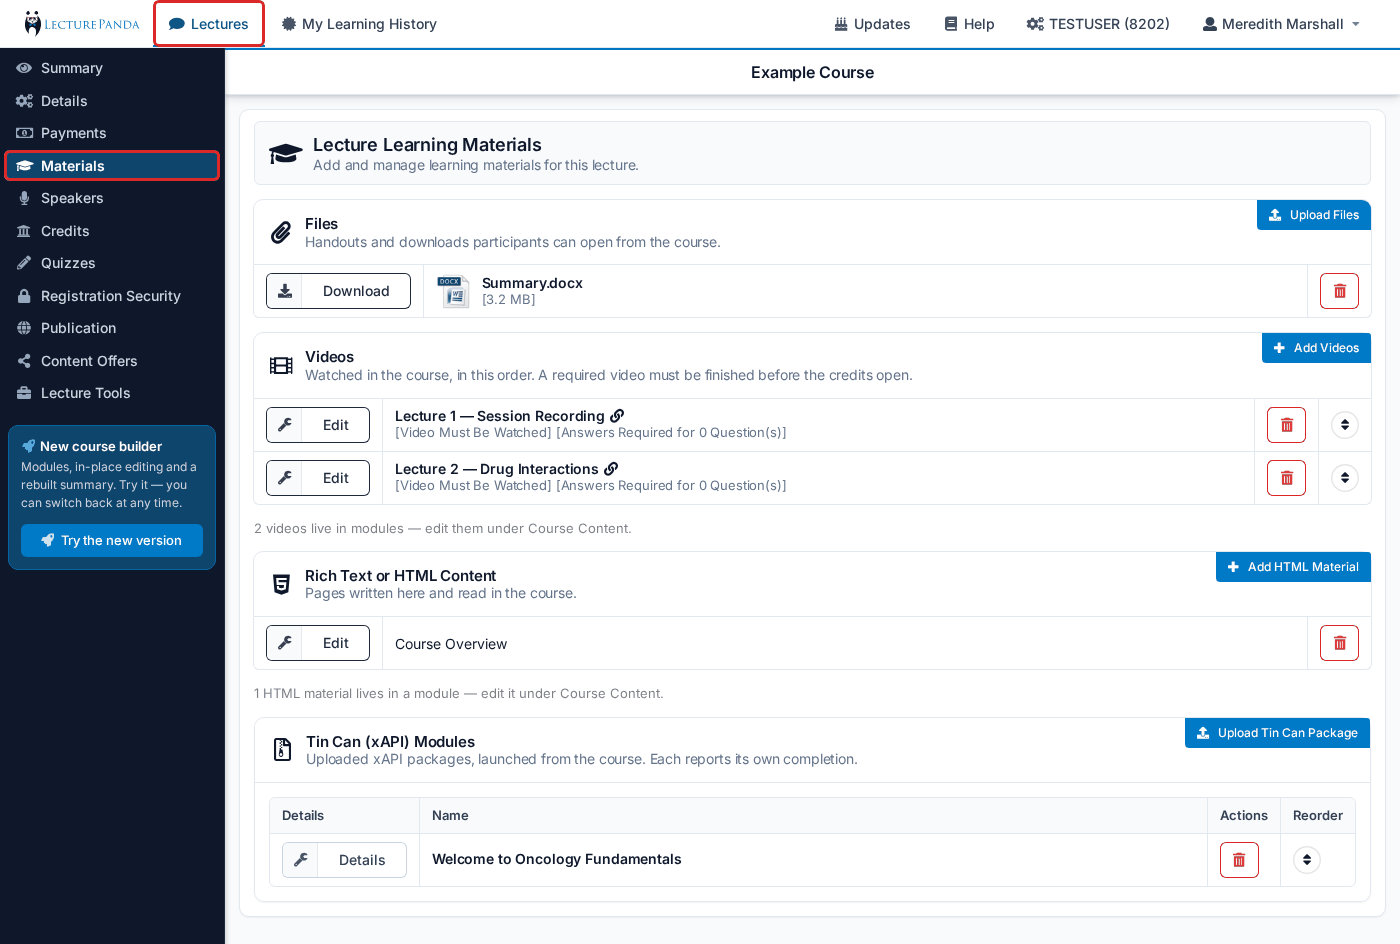
Add handouts, videos, and other materials to be included in your lecture.
This page describes the classic pages
In the new course builder, materials belong to a module: open the module under Course Content and click Materials — see Course Modules. There, one Add Material button offers Add HTML Material, Add Video, Upload File, Add xAPI (Tin Can) Module, Add PowerPoint and Add Tracked PDF, and everything — files included — is dragged into order. The forms themselves (video settings, video questions, HTML content, xAPI package page) are the ones described below. PowerPoints and Tracked PDFs are only available in the course builder — see PowerPoint Presentations and Tracked PDFs. A PDF added with Upload File is a download for learners to keep; a Tracked PDF opens full screen from the course page and can require a minimum reading time.
Learning materials are only ever available to people who have registered for the course (and paid, where there is a fee). The old Open Access option has been removed.
Files
Click the Upload File button and select the file(s) from your computer.
Getting files into the right order
On the classic pages, files sort alphabetically, not numerically — so 10 lands before 2. Pad single digits with a leading zero (
01 - Introduction,02 - Overview,10 - Summary) and alphabetical order matches the order you meant. Past 99 items, use two.In the course builder you can instead drag materials — files included — into any order on a module's Materials page. See Course Modules.
Which part of the course a file belongs to
On the classic pages, files added here belong to the course as a whole — they are not tied to one video. To make a handout belong to one lesson only, switch to the course builder and upload it on that module's Materials page: a file belongs to the module it was uploaded on, and learners see it inside that part of the course. (Learners see modules as "parts".) For a Storyline package you can also embed the file inside the package using its Resources panel, so the file travels with the content.
Videos
Click the Add Videos button to add a video to your lecture. Videos play in the order listed; drag a video by its handle to reorder. LecturePanda supports Vimeo (recommended) and YouTube as video hosting platforms. Simply copy the video URL and paste it into the field below.
- Video URL: Enter the URL link to your video.
WARNING
Google Drive and other internal hosting platforms (SharePoint, MS Stream) are not supported. Videos must be hosted on Vimeo or YouTube for reliable playback.
TIP
If a Vimeo video won't load, check your Vimeo privacy settings — embedding must be enabled, and if you have domain restrictions, add your LecturePanda domain to the allowed list.
Let Vimeo finish processing first
Paste the URL only once Vimeo has finished transcoding — when the processing spinner has gone and the video plays cleanly on Vimeo's own page. A URL added mid-transcode often plays unreliably, loads slowly, or cuts off partway, and the symptoms look like a LecturePanda problem rather than an unfinished upload.
- Video Title: Enter a video title.
- Transcript URL (Optional): A link to a transcript or text alternative for the video. This is what makes the recording usable for someone who cannot see or hear it, so add one wherever you can. For videos whose meaning depends on what is on screen rather than what is said, also add an audio description track in YouTube Studio or your Vimeo settings.
- Require Entire Video To Be Watched To Continue: Forces the participant to watch the entire video before moving to the next step.
- Require Questions To Be Answered To Continue: Forces the participant to answer the questions connected to this video before moving to the next step.
- Enable Questions in Preview: For editing purposes only. While editing the settings for this video, the embedded questions are hidden to make it easier for the Admin to find particular time stamps in the video. Admins can check this box to re-enable previewing the questions while editing. To see details on creating video questions, see here.
Rich Text or HTML Content
Optional (Recommended). Enter additional information about the lecture learning materials. This information will be visible to users when they access the lecture’s learning materials.
- Title: Enter a heading for this additional information.
- Text Material: Enter any relevant information or instructions.
TIP
If a lecture has multiple sessions each with a different webinar link, the Text Material is a great place to enter information about each session along with its unique webinar link.
Tin Can (xAPI) Modules
Optional. Interactive packages exported from an authoring tool such as Articulate Storyline. Click Upload Tin Can Package and choose the
.zipfile. (In the course builder: Add Material › Add xAPI (Tin Can) Module.) See xAPI Modules for how to build a package LecturePanda can read.Click Details on a package to open its page:
- Title and Description: Read from the package when it is uploaded. You can change both here.
- Required To Continue: Participants must complete this package to continue past the learning materials, in the order it is listed with the other required videos and packages. Uncheck it to make the package optional.
- View Response Data, Activity & Time and Preview Module: Reports on what participants answered and how long they spent, and a preview of the package.
"Modules" here are xAPI packages
The words "Tin Can (xAPI) Module" — and "Learning Modules" on the learner's course page — mean an uploaded package. They are older terms and are not the same thing as the modules a course is built from in the course builder.
"… live in modules — edit them under Course Content."
If a course has had modules added in the course builder, the classic Materials tab lists only the first module's materials (first in the Course Outline order). A grey note under each section — for example 2 files live in modules — edit them under Course Content. — tells you how many more there are. Switch to the course builder to edit them.
Creating Video Questions
Use the blue “+ Add Question” button at the bottom of a video’s settings to add questions that appear during playback.
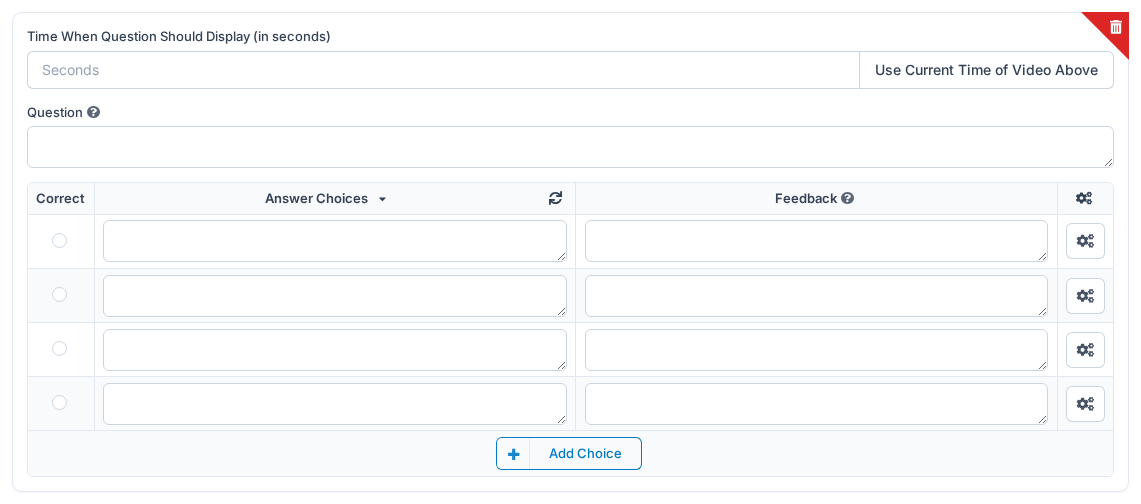
Time When Question Should Display
Select the time stamp, in seconds, when the question should display.
TIP
Navigate to the desired time in the video and use the “Use Current Time of Video Above” button to select the time stamp.
Question
Enter the question that will display at the selected time stamp.
Answer Choices
The system allows you to select from preset choices or build your own custom choices.
Feedback
Adding feedback allows attendees to get customized feedback depending on which answer they’ve selected. If left blank, the participants will receive generic ‘Correct’ or ‘Incorrect’ feedback.