
Appearance
Course Configuration
These settings apply to every course in your account. Set them once and each new course inherits them, rather than configuring the same thing over and over.
Find them under Organization Settings → Course Configuration.
| Page | What it controls |
|---|---|
| Participant Experience | What learners see and receive, plus automatic catalog housekeeping |
| Certificate Templates | The PDF certificates your credits generate |
| Registration Types | The categories learners pick from when they register |
| Accreditations | Connections to accrediting bodies, for providers who report externally |
| Custom Fields | Extra questions on the registration form |
| Marketplace | Sharing your courses with other LecturePanda organizations |
| Permissions | Which staff can reach which of these settings |
Participant Experience
Configure settings that affect your participants.
Communication
Enable Help & Contact Widget
Adds a help widget so people looking at your courses can ask a question. Their questions are sent to the Public Contact Email below.
Public Contact Email
Where those questions go. Required once the widget is enabled.
Use a shared mailbox
Point this at an address more than one person watches. It is the address learners will use when they are stuck, and it is published on your course pages.
Include Payment Receipt in Confirmation Emails
Attaches a payment receipt to the registration confirmation email. Useful when your registrants routinely need a receipt for reimbursement, and it saves them writing in to ask for one.
Where the receipt gets its details
The receipt is headed with the logo and company details from Company Info.
Course Management
Auto-Unpublish Expired Courses
When enabled, courses drop out of your catalogs (Publications/Series) once all of their credits have expired. The job runs daily and only acts when every active credit with an expiration date has passed — credits with no expiration date never expire, and a course that has one stays published.
Existing registrations are untouched
Only catalog visibility changes. Learners who already registered keep their access and can still claim their credit.
TIP
This is on by default. Turn it off if you would rather decide yourself when a course leaves your catalog.
Auto-Unpublish Courses When Registration Closes
When enabled, courses drop out of your catalogs (Publications/Series) once their Close Registration On date has passed, whether or not their credits have expired. The job runs daily and only looks at courses with registration time limits turned on; a course with no close date stays published. Existing registrations are untouched.
This is off by default.
Lecture Categories
If your account manages its own category list, a Lecture Categories field appears at the bottom of the page. These are the categories available when you build a course, and they are what learners filter by in your catalogs. Not every account has this — if you do not see it, your categories are managed for you.
Certificate Templates
Create certificate templates that will be generated based on the lecture's credit information.
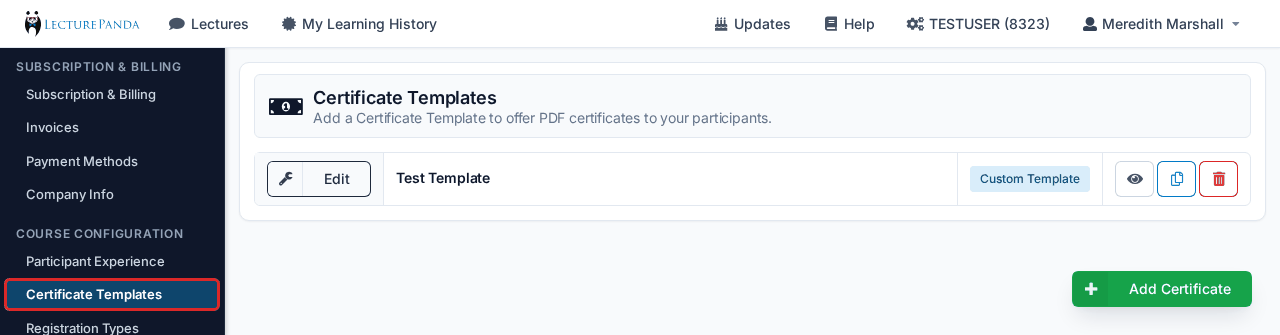
Every account starts with a standard certificate template, and it works without any setup. Build additional templates when you need a different look — the usual approach is to duplicate an existing template and edit the copy.
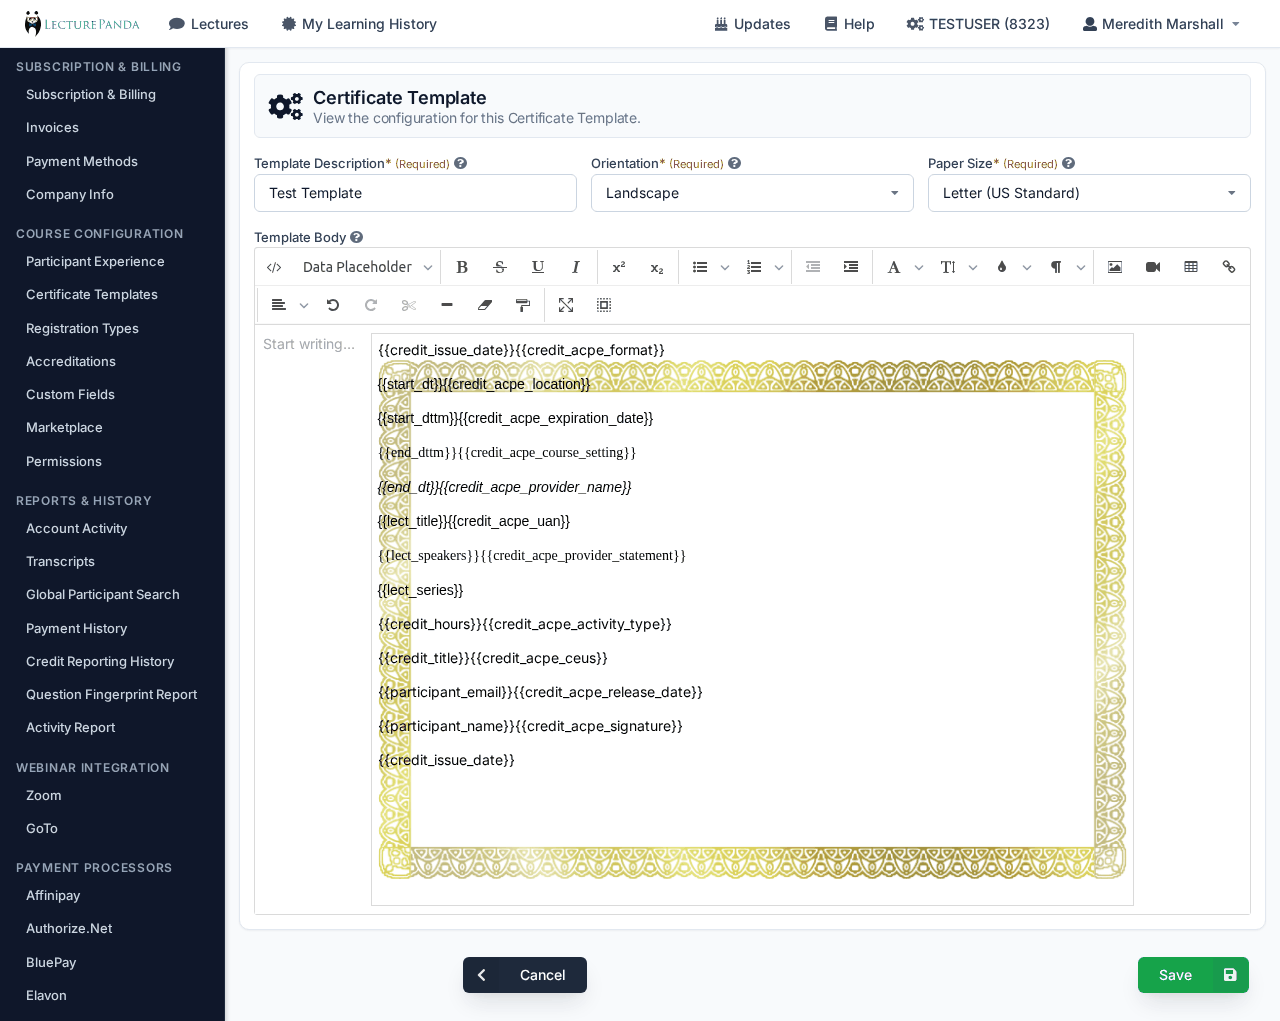
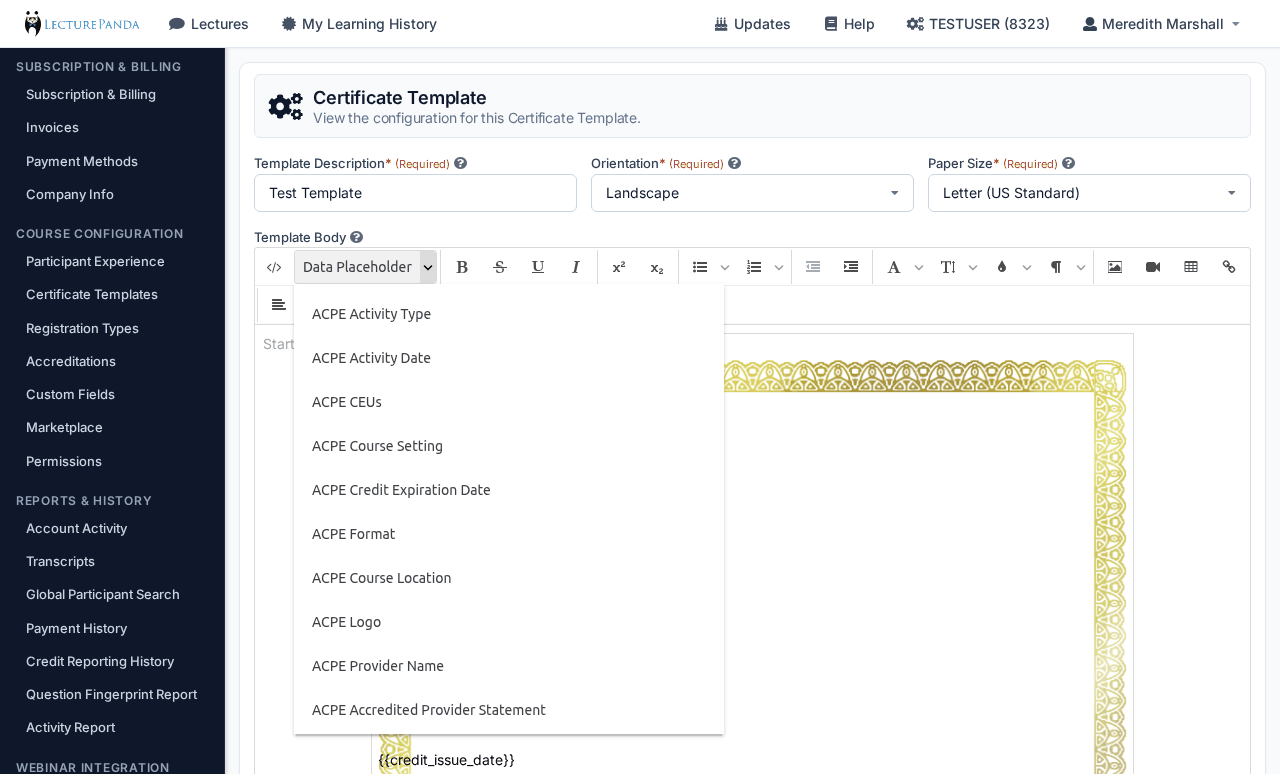
Templates are built from your own layout plus tags that get replaced with real values when the certificate is generated — the participant's name, the credit hours, the completion date, your accreditation statement, and so on. Use the drop-down list of tags rather than typing them by hand, so the names always match.
Each template in the list has three actions beside it: preview it against sample data, copy it to start a new one, and delete it.
Building or changing one?
Designing a Certificate Template walks through the whole job — placeholders, getting the date right, making the layout survive the PDF, and the ACPE-specific tags.
Registration Types
Create and manage Registration Types for all lectures.
Registration Types are the categories a learner picks from when registering — "Member", "Non-Member", "Student", "Pharmacist". They matter beyond labelling: pricing rules can charge each type a different price, and different types can be asked different questions.
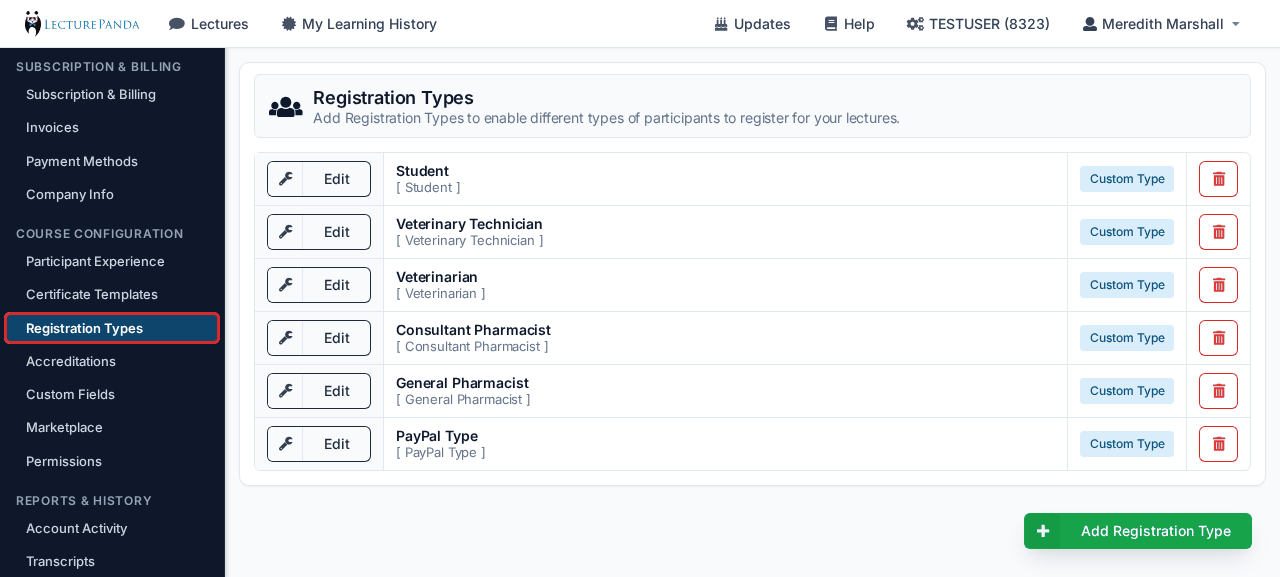
Each row in the list is tagged Standard Type or Custom Type. Standard types are built in and cannot be edited or deleted; custom types are the ones your organization created.
Creating a Registration Type
Use the green + Add Registration Type button. The form has three parts — Identifiers, which name the type, Emails, which sets the wording of the button in these registrants' emails, and Registration Form Questions, which decide what these registrants are asked.
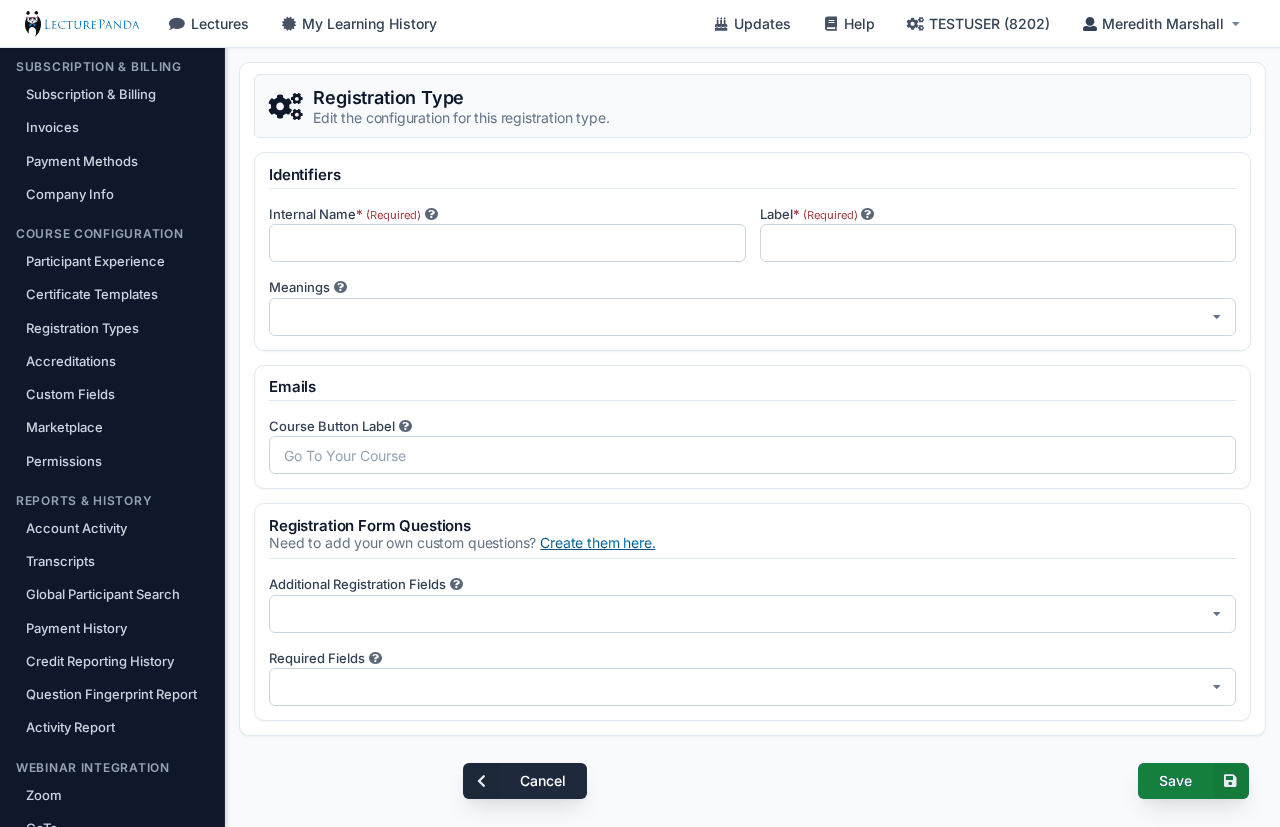
Internal Name
The internal identifier. Participants never see this name.
TIP
Use something specific enough to pick out of a list months later.
Label
What participants see when they register.
TIP
Use a broad name that makes it obvious who should choose it.
Meanings
Optional. Marks what this registration type represents for accredited reporting — ACPE: Pharmacy, ACPE: Physician, or ACPE: Nurse. Set it only if credits earned by this type are submitted to ACPE; leave it blank for every other registration type.
Course Button Label (Emails section)
Optional. Every email LecturePanda sends a learner — registration confirmation, starting soon, reminders — has one button that takes them to their course page. This is the wording on that button for registrants of this type.
- Leave it blank and the button reads Go To Your Course.
- Registration types that existed before this field was added keep the wording the button always had, Complete Credit Requirements, which is filled in for you. Clear the field to move to Go To Your Course, or type your own wording.
TIP
Pick wording that suits what these registrants do next. "Complete Credit Requirements" fits a CE audience; "Go To Your Course" fits everyone else.
See Emails LecturePanda Sends for the emails themselves.
Additional Registration Fields
Optional. The extra questions these registrants are asked. Everyone is always asked for a name and email address, so those are not in the list.
Required Fields
Optional. Which of those additional questions must be answered before registration can be submitted.
Required fields cost you registrations
Every mandatory question is another chance for someone to abandon the form. Require only what you genuinely cannot proceed without — for ACPE reporting, that is the NABP e-Profile ID and date of birth.
Need a question that doesn't exist yet?
The Create them here. link in the Registration Form Questions section takes you straight to Custom Fields. Build the question there, then come back and attach it.
Accreditations
Add an Accreditation to enable accreditation statements and reporting.
This is where connections to accrediting bodies live. Add one and LecturePanda can print the right accreditation statement on your certificates and, for most bodies, submit completions on your behalf.
The supported types are ACPE, ACCME PARS, CE Broker, Credly, Badgr, and Custom Accreditation.
Only if you report to an accrediting body
Most organizations never touch this page. Certificates, completion tracking, and reports all work without an accreditation configured — see Do You Need This? if you are not sure.
Setup differs by body, so each has its own guide:
- ACPE / CPE Monitor — for pharmacy CE providers
- CE Broker
- ACCME PARS
- Credly and Badgr for digital badges
- Custom Accreditation — a statement on the certificate, with no external submission
Custom Fields
Create custom fields that can be used to gather information about participants.
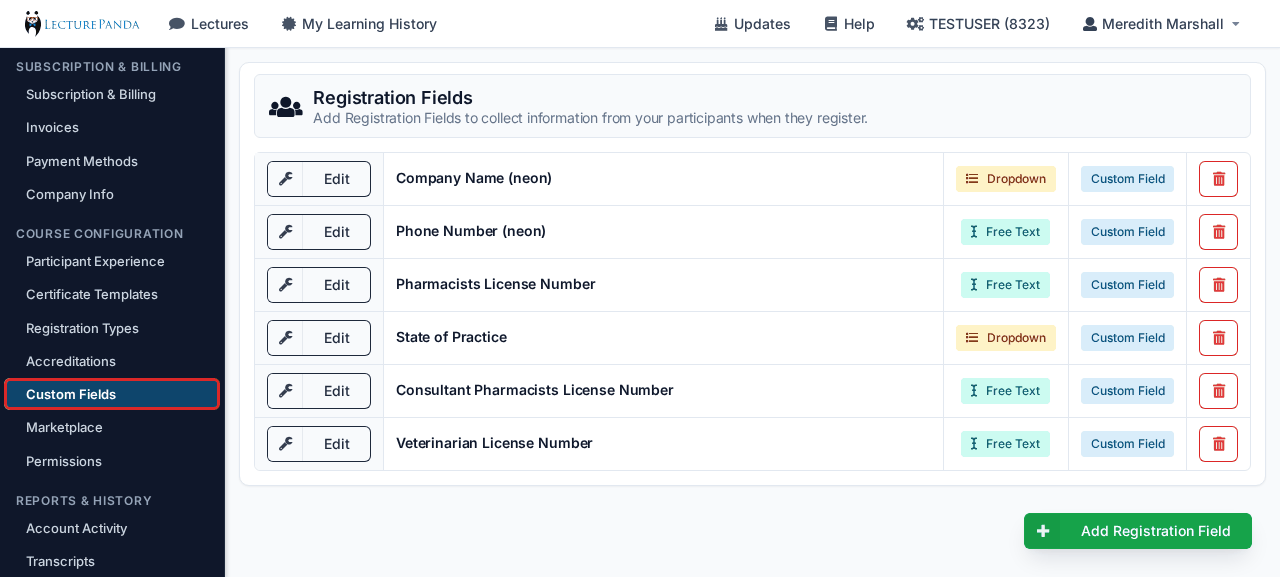
Questions created here can be attached to a specific Registration Type or asked of everyone regardless of type.
Two names for one thing
The sidebar calls this Custom Fields; the page itself is headed Registration Fields. They are the same screen.
Creating Custom Fields
Click the green + Add Registration Field button.
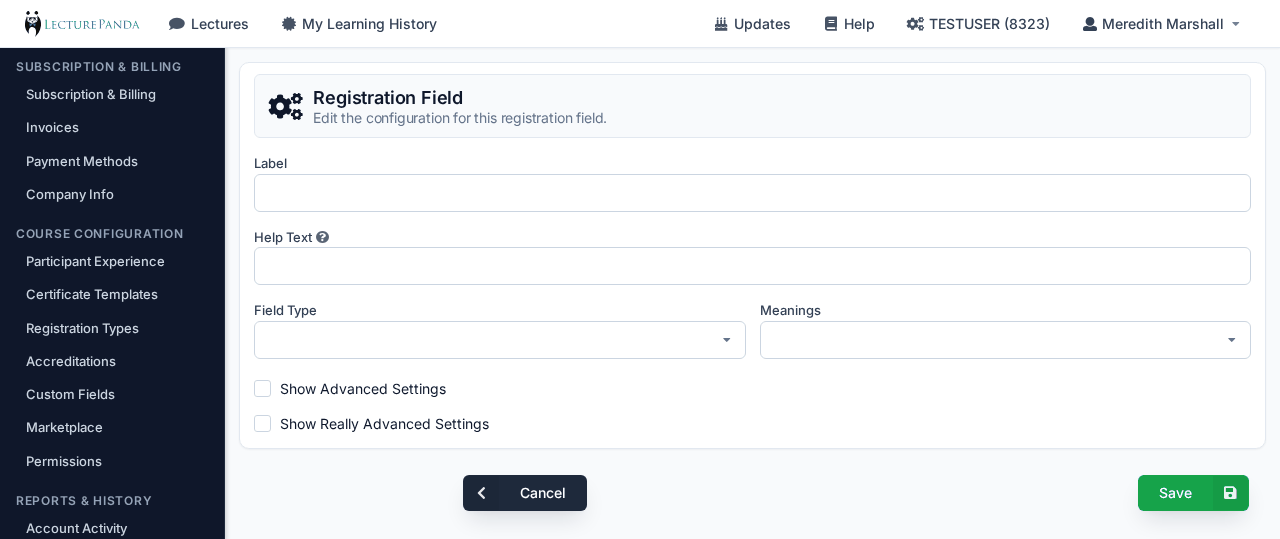
Label
The question you want to ask registrants.
Help Text
Optional. Shown to the registering person in a small "?" bubble beside the field. This is the right home for a disclaimer or clarification tied to one specific question — it is there for anyone who wants it, without cluttering the form for everyone else.
TIP
When a note applies to the whole form rather than one question, put it in the course description or on a welcome page instead, so learners read it before they start filling anything in.
Field Type
Free text, a dropdown, or an address search. Choosing dropdown reveals a Choices list, and you can paste a pre-written list of options into it rather than adding them one at a time.
Address (Google search) turns the question into a search-as-you-type box powered by Google Places. Registrants must pick one of the live suggestions — real, street-level addresses anywhere in the world — so the answer is always a complete, correctly formatted address. A green Confirmed label inside the field shows the pick took, and the address then flows through your reports, exports, and certificate merge tags as ordinary text. Address fields keep the configuration simple: choices, input masks, patterns, and meanings do not apply and are hidden.
TIP
Because registrants anywhere in the world can find their address, this is the field to reach for when a hand-built State dropdown starts blocking international registrants. One current limit: CE Broker/PARS reporting-state fields and NeonCRM address mappings still need their own text or dropdown fields.
Meanings
Optional. Maps this question's answer to a field another system expects — the NABP e-Profile ID and Birthday used for ACPE submission, or a NeonCRM contact field. Custom questions that only feed your own reports do not need one.
Show Advanced Settings
Input Mask: forces data into a shape as it is typed.
99/99/9999displays as__/__/____and accepts only digits.TIP
9= any number.a= any letter.*= any character.
Show Really Advanced Settings
- Regular Expression Pattern: the pattern the answer must match.
- Regular Expression Error Message: what the registrant is told when it does not match.
Test the pattern before you publish
A pattern that is stricter than you intended blocks real registrants, and they will not be able to tell you why. Register yourself as a test first.
Marketplace
Set up your Marketplace to allow other LecturePanda users to list your lecture on their Publications.
The Marketplace lets you share a course with other LecturePanda organizations and split the registration fees, or list somebody else's course to your own community and take a share.
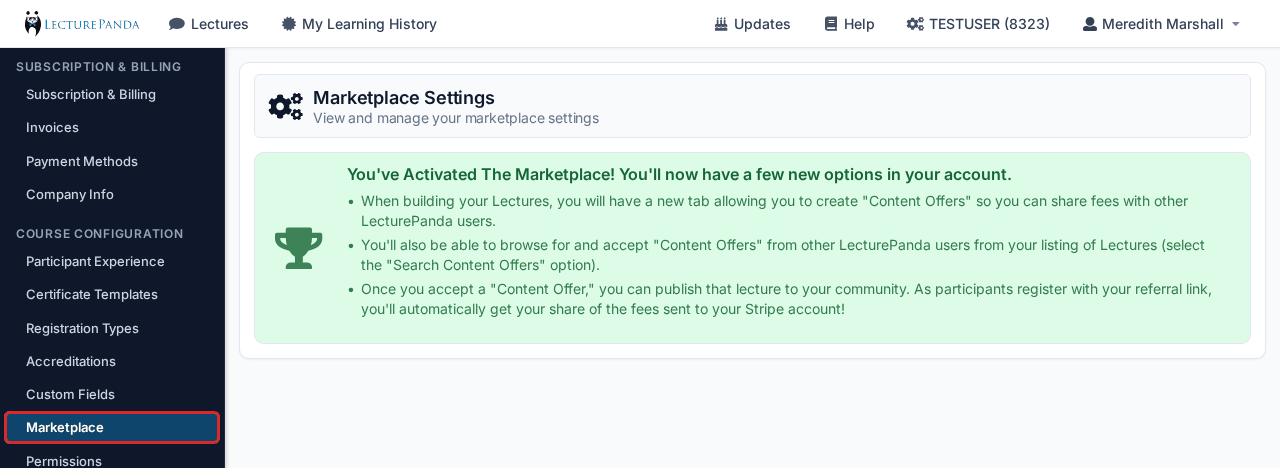
Activating it takes three steps, tracked as a checklist on the page:
- Add a Stripe account, under Payment Processors. This is where your share of the fees is sent.
- Review and agree to the Marketplace Terms of Service — an extension of the standard terms covering everyone's role in a shared sale.
- Select a Stripe account for your payouts from the dropdown that appears, then save.
Once active, you get a Content Offers tab when building a lecture — Publication › Content Offers in the course builder — (to offer your course to others), and a Search Content Offers option in your lecture list (to accept somebody else's). Accept an offer and you can publish that course to your community; registrations through your referral link pay your share into your Stripe account automatically.
See Content Offers for the course-level settings.
Permissions
Which of your staff can reach each of these pages is controlled under Organization Settings → Permissions. Every page above is permission-gated, so a colleague who cannot see a section usually needs a permission rather than a workaround.
See Admin Access & Permissions for the permission levels and how to invite someone.